skip to main | skip to sidebar

oUr bAcKyArD

oUr bAcK yArD is the hub where exciting things happen that enrich the simple lives of the Urbanpermies


We believe that the urban garden is one of the solutions in the face of rising cost of living. By applying permaculture principles in the design and lifestyle, we seek to maximize onsite resources to meet most of our needs with minimal impact on the land.

Saturday, 1 December 2007

Growing Carrots - Part 1

I'm having success germinating and growing most plants so far but the carrots planted in spring has failed miserably. Anyway in all true Permaculture spirit, make as many mistakes as possible and learn from mistakes. So, I've learnt the 3 DON'Ts for growing carrots-
-Don't let the veg bed dry up
-Don't use strong watering sprayer
-Don't plant them too far apart otherwise they don't germinate

I haven't given up growing carrots yet. In my search for better ways of growing carrots I came across this website Tinker's Gardens that has a really good tip on sowing carrot seeds.

Tiny Seed Planting Technique:

When planting tiny seeds in your beds Make a shallow furrow the appropriate depth, or directly on top of bed. Roll out a strip of toilet paper in the furrow. Deposit the seeds on top of the toilet paper. This will enable you to see the seeds drop and adjust the spacing, which will save seeds and the amount of thinning-out necessary later. Roll out another layer over the seed and lightly sprinkle or mist with water to hold the layers in place. Lightly cover with soil and gently sprinkle with water. This will prevent the seed from being scattered when lightly watering. The seeds will germinate and grow as usual, right through the paper, which will disintegrate after a few waterings.


Labels: Tips, Vege Garden

Sunday, 11 November 2007

Collecting Gold - Part 1

We went to an Organic dairy farm to collect some lovely cow pats for our compost on Sunday evening. We had never done this before and had no idea what to expect but an imagination of happy growing plants in our garden.

So Matt and I each armed with a pair of gum boots, gloves, a spade, containers and sacks zoomed off to the farm 20 minutes away. Oh and not to mention the overalls as armor from the dung.

At the farm, we soon found that fresh dung is pretty wet and not very pretty to behold and touch. We quickly filled up our containers with the fresh dung. We then went in search for dried dung in the paddock to fill the sacks.

I went off down the side of the fence in search of dung, while Matt went out into the middle of the paddock. He figured out pretty quickly that the best place to find dried cow pats is around where the cows shelter from the sun or are herded as they get nervous and start dropping oodles of the stuff right there! The dried cow pats are surprising odourless and easy to handle. 3 quarter of an hour later, we had 2 containers and 5 sacks of GOLD for the garden.

I'll continue in another post why all the hassle with cow pats...


Labels: Compost, Vege Garden

Broad Beans

The dwarf broadbeans from Kings Seeds planted in May were harvested last weekend. They had stopped flowering and were starting to get rust. I harvested about 7 kgs of broad beans from a round garden bed over a period of one and half months. The bean pods were large and beautiful but it didn't have that many beans in them. There were a lot more irregular beans than the normal broadbean planted the year before.

A few points worth noting:
1) They definitely had less seed pods but the beans were sweeter than the standard variety.
2) It's an early variety so the veg bed is available for other seasonal vegs on the first week of Nov. before the weather gets too hot and rust becomes a serious problem.

I shelled the pods and freeze the beans for later.

I've planted a row of Rua potatoes in the same vege bed along side some self- sown parsnip. The mulched down broadbean plants will be used as mulch for the growing potato plants.


Labels: Autumn Garden, Spring Garden, Vege Garden

Friday, 9 November 2007

Permaculture Paradise or not?

Photo by ROBERT CHARLES

Permaculture paradise

The Tribune, Sunday, 4 November 2007

Urban Permies are creating sustainable human environments, reports Ruth Vlaming.

Think sustainable and what springs to mind? Probably renewable energy, organics, recycling, but what about permaculture?

Permaculture, as defined its co- founder Bill Mollison, is a system for creating sustainable human environments. And in Palmerston North the Urban Permies are putting permaculture principles to work in the backyard.

Founder of the group, Esther Teoh, and husband Matthew Hook, have gradually converted their 640m2 property into a permaculture paradise, since acquiring it four years ago.

The quietly clucking chooks and flourishing veggies, interspersed with fruit trees and flowering plants, testify to their efforts to put theory into practice.

Ms Teoh says permaculture is about systems and relationships. For example, chooks scratch over the soil, helping prepare it for planting by removing pests and seeds and manuring it. They also provide fresh eggs. The chooks are moved around the property in a homemade portable chicken tractor.

Since things work together there is often less need for pest control, ground cultivation and weeding than conventional gardening methods - an important aspect with the couple working full-time, and doing house improvements. Ms Teoh finds the aesthetics of mixed planting pleasing too.

It wasn't difficult to find the information with plenty on the internet and in books and magazines.

Wikipedia says the word permaculture, coined by Australians Bill Mollison and David Holmgren during the 1970s, is a portmanteau of permanent agriculture and permanent culture.

Through a series of publications, Mollison, Holmgren and their associates documented an approach to designing human settlements, in particular the development of perennial agricultural systems that mimic the structure and interrelationship found in natural ecologies.

Ms Teoh and Mr Hook have enjoyed the harvest of the past year with highlights 10kg of tomatoes from one plant last summer, and buckets of peas through winter. A stroll around the garden reveals blossoming apple, pear and quince trees, and immature fruit on the almond and currants. Newly planted beds of brassicas, leeks and celery are mounded with compost.

The wind break doubles as a trellis for vines, and also provides shade for smaller plants.

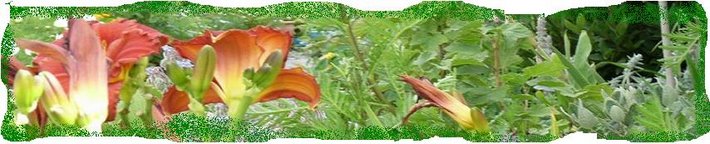
The very functional garden has not sacrificed attractiveness for production, however. A pretty variegated mint spills on to the path and rainbow silverbeet brighten the garden under the kitchen window. Calendulas provide splashes of colour throughout, and two manukas in full flower contrast with impressive globe artichoke heads.

All this is quite an achievement for someone who seven years ago didn't know anything about gardening.

"I killed cacti," Ms Teoh laughs.

A period of ill-health stimulated an interest in herbal remedies. Her first garden consisted of pots on a balcony. There herbs thrived and tomato plants flourished, enthusing her with rewarding harvests.

Ms Teoh dismisses the suggestion Palmerston North's climate is problematic for growing one's own food. It simply doesn't suit some plants, such as the banana plant she tried. And wind protection is vital, but possible with planning and design to achieve shelter and smooth wind flows. Observation is also important - noting what thrives where.

She says permaculture involves gradually working out solutions and always learning.

Total self-sufficiency is not the aim - the couple still buy basics such as rice, sugar and flour, but grow most of the vegetables they need and increasingly more fruit.

To share her passion for permaculture, Ms Teoh started Urban Permies earlier this year. The group meets on the first Saturday of every month to discuss permaculture principles and share tips, ideas and even produce.

"It's a place for interaction with like- minded people, you learn by sharing," Ms Teoh says.

New members are welcome and membership is free. For details email urbanpermies@orcon.net.nz or visit www.urbanpermaculture.org.nz.


Labels: Permaculture

Wednesday, 7 November 2007

LeEkS take forever....


to germinate and grow. So sow seeds now for planting in January and eating in winter...no kidding.


Labels: Spring Garden, Vege Garden, Winter Garden

Monday, 5 November 2007

Square Foot Gardening

Imagine growing Zuccinni and squash like a tomato vine up a stake? Apparently you can. A friend sent us this link.

The thought of growing zuccinni on a stake gives me the giggles and I'm looking forward to staking my zuccinni and possibly some squash.


Labels: Vege Garden

Urban Permies Monthly Meeting

We meet on the first Sat of each month at 2:30pm. Venue changes depending on what we do. I usually send out an email on the Monday with details of the meeting.


Labels: Urban Permies Monthly Meeting

Sunday, 4 November 2007

Cutworm

Judith, my gardening buddy, found this in her garden yesterday. It is a larval stage of a moth and yes it cuts down your seedlings in the dead of night. So, if found, feed it to your chookies or kill it.


Labels: Judith's Garden, Pest and Fungal Control

Thursday, 1 November 2007

Lightweight, Energy independent, Odourless Tractor....no such thing?

Just before you dismiss it as a crazy idealistic notion, it does exist. It's the CHOOK TRACTOR.
The chook tractor is an integrated part of our food production system in our evolving Mandala's garden. It is placed on grounds where grass or weeds or expired veg beds need to be cleared. The chookies will happily help themselves to the gourmet feast of slugs, snails, worms and a variety unwanted of greens. This reduces effort on weeding and moving the vegs to the compost heap.

Within 2 weeks, all the greens will be demolished and ground cleared of weeds and seeds, and the ground manured. If you place some pea straw or straws of any kind in the tractor after they've cleared the ground, they will happily eat all the seeds and hidden creatures and spread the straws nicely for you, and even add nitrogen to it as well. By the time we move the chook tractor to the next destination, the ground is well mulched and ready for planting.

If you want an extended area to be cleared but it doesn't fit the tractor, don't worry. Use chicken wire to create an enclosure and peg it down with standards (those use by farmers for electric fencing). If you want to keep the chookies in, use bird netting over the chicken wire. The chookies get to free range but only in the areas you like them to clear (and not your planted veg beds).


Labels: The Chooks, Vege Garden

Wednesday, 31 October 2007

The Mandala garden in late August

Since I’ve read Linda Woodrow’s book “The Permaculture Home Garden” I can’t stop thinking about the Mandala’s garden working in conjunction with a chook dome. After measuring up the garden and deciding on the no of beds we want, Matt modified the design given in the book and build a pretty sturdy chook do me. We have since removed our square beds displayed in the earlier blog and replaced with round beds, with the help of our chookies. The Mandala garden is still in its infancy stage and I’m learning to garden with round beds instead of boxes. It takes a bit of getting used to.


Labels: The Chooks, Vege Garden

Globe Artichoke

We planted the Globe Artichoke 6 months before our wedding. It has since died back and grown back over the last few years, each time with more dramatic display and growth. The first year, we admired the dramatic foliage, let the globes flowered and seeded, pruned it and added to our compost heap. The second year, we gave most of it to a friend who happened to enjoy them. This year, we’ve decided that it may possibly be edible and decided to give it a try. And it turned out to be quite tasty if we harvest it before it gets too big. I harvest it when it’s slight bigger than the size of my clenched fist. Next, I slice off one third of the top and chop off the stalk. Then, I put it into a pot of boiling water with a teaspoon of salt and boil the life out of it for about 20 minutes. After that, remove it from the pot of hot boiling water, either eat it as it is, or pull it apart and add it to a delicious salad. You’ll be pleasantly surprised! You can also check out this link to see how to appreciate artichokes.


Labels: Vege Garden

George the Second

For about 2 years, George the 1st lived in the crack at the top right corner of the kitchen window. We watch George the 1st feasted on bugs and flies and grew bigger through the two years. It was a comfort to see that George the 1st kept the summer flies under control. One day, we found George the 1st lying dead on the kitchen bench. We called our good friends and told them the sad news but they laughed so hard!!! One night, we heard a knock on the door, it was our friends. They had turned up with a replacement for George the 1st, which we named George the 2nd. George the 2nd has since taken over the task of George the 1st and is doing a great job in keeping the flies population down, and is flourishing with the feed. The White flowers from the clusters of buds are quite breathtaking.

George the 1st was a spider and George the 2nd is a fly trap plant!


Labels: Fun Stuff

Friday, 12 October 2007

Friend's advice for a winter veggie garden

Judith is the friend who has an amazing winter veggie garden. When I ask her about planting for winter, this is her advice:

Start thinking about winter now, yes. I know we have just finished but winter veggies take a long time to grow. I have just started the rotation system of O R B. This is the order that plants follow each other. Where the Brassicas (Broccoli, Caulis, and Cabbage) have grown, you plant others (lettuce, onions/leeks, silverbeet, beans/peas). Where the others have been you plant Roots (carrots, parsnips, potatoes) and around you go.

Sometimes you have to "fiddle the books" but I am sure you get the general idea. And I am only just sorting this one out, but you need to get the seed in so that the plants are big enough to into their permanent position in January/Feb/March.

Broad beans - almost ready now get planted in April/May.


Lettuce is short (2-3mths from seed)crop.

Brassicas - October is the last month for planting seed unless you want to battle with the white butterfly over late December - May. Sow seed of these in Jan/Feb to eat June/July.

I could go on. I am still observing and experimenting and should keep a diary. Need to plant corn seeds in pots this weekend to plant out in 2-3 weeks. I do the next sowing when I have transplanted these so get 2 - 3 sowings a season. You need at least twenty plants for a good harvest so room becomes a factor.


Labels: Judith's Garden, Propagation n Planting, Winter Garden

Thursday, 11 October 2007

2007 October Urban Permies meeting

We had a rather international gathering represented by 4 nationalities, French, Singaporean, Kiwis and American. It's spring so we decided to do gardening for free - plant propagation through softwood cutting, with a focus on some herbal plants. After that, we retreated back into the house to enjoy a nice cup of Lemon Balm tea and followed by more discussions on plant propagation. Somehow the discussion led to the health benefits of raw milk and other things we can do with raw milk. Check out these websites if you're keen.


Lemon Balm tea

Put a handful of lemon balm leaves into a teapot
Put hot water into the teapot
Wait a few minutes
Serve it on individual cups with half a teaspoon of honey on each cup

It's a very relaxing tea with the most amazing aroma. No wonder bees go crazy over lemon balm.

Since the meeting, I've done more reading on softwood propagation. The key thing is to keep the cuttings moist and using a propagation mix that contains 60-70% coarse sand with a good potting mix for a greater success rate. I'm experimenting softwood cuttings with capegoose berry and a native plant at the moment.

The plan for the next meeting is to visit a small farmlet that produces raw goats milk. Still on the pipeline. More information coming...


Labels: Herbs, Propagation n Planting, Urban Permies Monthly Meeting

Tuesday, 18 September 2007

Organic Fungal (RUST) Control

There are rust on a patch of vegetation. From my research for an organic combat, Neem Oil and Garlic sprays are two natural fungal control for Rust.

Garlic Spray:
1 garlic bulb
1 quart water
crush the garlic bulb, place in a pan of water. bring to boil then turn off heat.let mixture cool. Strain out garlic.Pour liquid into spray bottle and spray affected areas of plants. repeat as`necessary.

Garlic is known to fight many types of disease causing fungi, including mildew,gray mold, rust. Garlic has not only been shown to fight fungi, but it also has repellent qualities for other diseases and insects. Plant Garlic bulbs next to your roses, and you should not have any problems with aphids.

Milk is another combat but it works a little differently from Neem Oil and Garlic. A comment from a forum:

There are many layers of bacteria and fungi living on the outside of your plants. The simple proof of that is the rust fungus living on the outside of your plants. The problem is that the beneficial microbes, which usually live there and protect your plants from disease, have lost their ability to do that. They need to be revitalized. Your compost tea will help with that, but also I would spray separately with milk dissolved in water at 3 ounces per gallon of water. Spray as often as you want to. Up here we shoot for spraying every 2 weeks. Your area may appreciate it every week. The milk will provide real food for the microbes living on the plant surfaces and should restore the good health to the beneficials. Once they are healthy, they should eliminate the rust fungus for you.

As an experiment, I'll section out the problematic veg patch into 3 sections and try each of the remedies on 3 different areas. Looking forward to finding out the outcomes.


Labels: Pest and Fungal Control, Spring Garden

Tuesday, 11 September 2007

Winter gardening in Spring??

Not quite. What vegetables might you expect to be growing in winter? Not much one might say, but really, there are a lot more than we think. I visited a friend's garden, and the vege beds were packed with winter growth. It was a beautiful sight. Very encouraging too. This is Palmerston North we're talking about.
Apparently growing winter vegetables requires a bit of advance planning, at least 4 to 6 months ahead of time. This is done when summer gardening chores are also at their peak http://westsidegardener.com/quick/winter_veggies.html. Below are some vegetables that we could be eating from our garden in winter...the months are an estimate...I haven't done most it myself but this is the coming winter project - I know, I know, spring has barely started, but...

Do let me know if you've more winter vegs to add to the list and suggestions for winter gardening...

Some of more slow growing winter vegetables are: (6months ahead)
Leeks (sow in Nov for planting in Jan)
Celery (sow in Nov for planting in Jan)
Brussels sprouts (sow in Jan/Feb)
Cabbage (sow in Jan/Feb/March/April/May)
Broccoli (sow in Jan/Feb/March/April/May)
Cauliflower (sow in Jan/Feb/March/April/May)
Chinese cabbage
Parsnip

Some faster growing winter vegetables/herbs are: (3 months ahead)
kale
collards
kohlrabi
Chinese cabbage
winter carrots
silver beets
parsely (all year round)
snow peas
peas
sugar snap peas
potatoes
Broad bean (sow in April/May)

Fastest growing winter vegetables are (1 1/2 months ahead)
Lettuce (all year round)
winter spinach
radishes (all year round)


Labels: Winter Garden

Monday, 10 September 2007

Rhubarb Galore...

It's time to divide the rhubarb clump. I did it last weekend and harvested a fair bit of rhubarb. Matt (my husband) decided to make a Rhubarb cake last night. We brought the cake to work, it went down like a treat. It tasted so much better the next day - 2 minutes in the microwave oven to just slightly warmup the cake. It will taste even better served with unsweetened yoghurt. The downside is we didn't take a photo prior to eating it..

Batter:
150 grams butter
1/2 cup sugar
3 eggs
1 1/2 cups organic wholemeal flour (it gives very different texture from normal wholemeal flour)
2 teaspoons baking powder

Rhubarb Topping:
500 grams chopped up rhubarb - 1.5cm lengthwise (remove the stringy bits)
1 tablespoon organic whole meal flour
1 tablespoon ground cinnemon
1/4 cup sugar
rind/juice of a lemon

Cake Topping:
1/4 cup brown sugar
1 tablespoon ground cinnamon

Instructions:
Cream the slightly softened butter and sugar and then add the eggs, one at a time. After that, add the flour and baking powder, and turned the flour into the wet mixture - don't over do it.

Add all the topping's ingredients together and mix it well.

Spoon 3/4 of the batter into a 23cm square/round baking tin. Put in all the toppings. Spoon the rest of the batter on top of the rhubarb topping. Mix the cake topping together and sprinkle on top of the cake.

Bake at 160 degree centigrade for 45 -50 minutes (more if required -oven dependent).


This link has ALL the information anyone needs on Rhubarb


Labels: Recipes, Spring Garden, Vege Garden

Friday, 24 August 2007

June Urban Permies Meeting Update

This update is definitely long overdue. Andrew Rundle-Keswick http://www.webpagebuilder.co.nz an enthusiastic budding permaculturist wrote a really nice comment of my ever evolving garden so I have to share it :-)


I did a Permaculture Design course at Wanaka in May this year and as
part of that course I with other course participants did a Urban
Permaculture design for a urban property in Wanaka. The property in
Wanaka was a blank slate. We had a lot of ideas and sketched up
various ideas and concepts. When I visted your Permaculture property
in Palmerston North I was able to see lots of the ideas and concepts
in actual working application, plus many more besides. I think that
your property is a excellent example of how an urban Permaculture
property works. In a very small space you have a very large
production and it has inspire me to get on with converting my blank
slate property into something as good as yours.

Keep letting me know about your upcoming Permies Meetings as I would
love to come up again and bring my wife and children to show them
your property.

Andrew


Labels: Urban Permies Monthly Meeting

Thursday, 23 August 2007

Snow peas...

Apparently you can plant snow peas in autumn, winter and Spring and Summer....all year round
This is new for me too...


Labels: Autumn Garden, Spring Garden, Summer Garden, Winter Garden

Lemon Meringue Pie

I know I'm supposed to be on a hunt for healthy sugarfree recipes but one can't resist a good lemon Meringue Pie. Had dinner with a friend and this dessert was served. Absolutely loved it…another great point about this recipe - you use up all the eggs... oh well tomorrow is another day

Ingredients
1 tablespoon Butter
1/4 cup Edmonds Cornflour
2 tsp grated lemon rind
1/2 cup juice of lemon
1 cup sugar
3/4 cup Boiling Water
3 egg yolks

Meringue
1/4 Heaped teaspoon sugar
Egg white of 3 eggs
vanilla

Instructions
Mix cornflour to a smooth paste with a little cold water; stir in boiling water.
Boil 2 to 3 minutes.
Add butter, sugar, grated lemon rind and juice; cool; add beaten egg yolks.
Line a pie dish with pastry; add mixture when cool and bake about 30 minutes.
Whipped the egg white and sugar until peaked, put the meringue mixture on the pie
Turned oven off and left it for 30 – 45 minutes
Serve as it is or with homemade vanilla icecream


Labels: Recipes

Wednesday, 22 August 2007

Think Leeks and Brassicas and peas...

and then sow (seedlings) every two weeks to get a continueous supply. Once you plant a lot of seedlings into the garden sow the seeds for the next batch - it's a good habit to cultivate...a good reminder to myself here...


Labels: Autumn Garden, Spring Garden, Winter Garden

Tuesday, 21 August 2007

Still not too late to plant Snow Peas


If you had planted snow peas in autumn, you would be enjoying tonnes of yummy juicy and crunchy snow peas now. Anyway, I sowed about 20 seeds a week ago. They are sprouting nicely and hopefully will survive the slugs and snails attack.


Labels: Spring Garden, Vege Garden

Chocolate and Vanilla Swirl cookies

My father in law has recently been diagnosed with type 2 diabetes. I'm
now on a craze for REAL sugarfree biscuits. He loves his biscuits and
being a good daughter in law, I naturally like to impress....came to the
rescue is www.diabetic-recipes.com with an array of wonderful recipes...

(makes about 60 cookies)

1/2 cup (120 g) butter, softened
2 tablespoons (24 g) honey
2 teaspoons (10 ml) vanilla extract
6 tablespoons (90 ml) of egg
1 1/2 cups (210 g) organic wholemeal floor
1/2 teaspoon (2.5 ml) baking powder
1/4 cup (60 ml) organic raw milk, warmed to room temperature
1 teaspoon (5 ml) unsweetened cocoa powder

1. Cream butter, honey, vanilla, and egg. Beat well. Add flour, baking
powder, and 3 tablespoons (45 ml) of the milk. Stir to thoroughly mix.
Divide dough into 2 parts.

2. Add cocoa and chocolate extract to one part, stirring until well
blended. Chill both halves for at least 1 hour.

3. Working on a floured surface, roll out each part to a rectangle about 3
inches (7.5 cm) wide. Place chocolate part on top of white part, pressing
together tightly with a rolling pin.

4. Brush the chocolate dough with remaining tablespoon (15 ml) milk. Roll
up like a jelly roll to make a log about 1 1/2 inches (4 cm) in diameter.
Wrap in waxed paper and chill until firm, about 2 hours.

5. Preheat oven to 375°F (190°C), Gas Mark 5. Slice cookies 1/8 inch (.5
cm) thick. Place on a nonstick cookie sheet that has been lightly coated
with cooking spray.

6. Bake for 8 minutes, until lightly browned. Transfer to a wire rack to
cool.

Per 3-cookie serving: 85 calories (53% calories from fat), 2 g protein,
5g total fat, 8 g carbohydrate, trace dietary fiber, trace cholesterol,
73mg sodium

Diabetic exchanges: 1 carbohydrate (bread/starch), 1 fat


Labels: Recipes

July Meeting

We visited an Organic Dairy Farm. It was an interesting trip learning about the pasturing organic cows and the health benefits of milk from Jersey cows (A2 milk), non-pasturised milk. The facilities is simple but hygine is strictly observed to ensure that end product is at tip top condition for consumption.


Labels: Health, Urban Permies Monthly Meeting

Thursday, 24 May 2007

May's Meeting

We had some discussions infront of the cozy fire and enjoyed the homemade preserve and jam on crackers, and fresh walnuts. The dicussions revolved around issues relating to sponses not sharing the same passion about permaculture and potential conflicts. We didn’t come up with any concrete answers but it was really nice that as a group we could provide support to each other in this respect.

Tara's Chook Tractor
Over the last 2 months, 3 more of the regular members have made or acquired chicken tractors in various shapes and sizes. One of the topics for June’s meeting will be on chicken tractors, to discuss the pros and cons of the various designs and possibly come up with a more foolproof design(s). And to come up with strategies to integrate the chook tractors into the next growing season.


Labels: The Chooks, Urban Permies Monthly Meeting

Thursday, 3 May 2007

April's Meeting

The meeting was kicked off by watching the clip "Permaculture in the City" from The Global Gardener.

The video clip features the provision of social needs and food on previously wasted la
nd in big cities such as New York City. Through the use of Permaculture principles, maximized production achieved with restricted space and water supply. Plants are utilized in the design to lower energy input for buildings. Guild plantings are used to reduce malaria problems in Africa. Personally for me the settlement, Village Home in Davis California is my favorite.

It's a settlement designs to encourage both the development of a sense of community and the conservation of energy and natural resources. The principal designer was Mike Corbett. Construction on the neighborhood began in the fall of 1975, and construction continued from south to north through the 1980s, involving many different architects and contractors. The completed development includes 225 homes and 20 apartment units. If only more developers in NZ are expose to this concept. Totally blows my mind away..find out more at http://www.villagehomesdavis.org

The meeting was followed by a sharing of yummy afternoon tea brought by everyone. The unforgettable was the heirloom apple that Karine brought to share with us. Her husband, David, picked them from the Hort Research Orchard in Hastings. I've never seen apples in so many different sizes, colors and taste.


Next, Karine invited us to her place to visit their KUNE KUNE pigs.

Karine, David and their Kune Kune Pigs

The meeting also became a family outing for Tara's children, Max and Abby (my most favorite children ever!!), resulted in an educational experience for them who had never had a close up experience with pigs.


Karine and David "supervising" Tara, Max and Abby while they checked out the pigs!

That concluded our most interesting meeting in April.

See you all in May!!


Labels: Pigs, Urban Permies Monthly Meeting

Wednesday, 2 May 2007

WOW..that's a super jumbo!


Since we haven't bought eggs for a year, we didn't know that eggs could be bigger than those we got from our chooks. When a new member, Ginger, was introduced into the chook family, we were amazed at the size of the eggs it laid...(Ginger's egg on the left, and Broodie's on the right )


Behold, Ginger, the star


Labels: The Chooks

Ded's Cherry Tomato Salad

If you have cherry tomatoes growing out of your ears and not sure what to do with it, try out this yummy recipe inspired by my Thai friend, Ded.

It's one of those recipes that you can get your child to help but watch out for those juice squirting out of the cherry tomatoes...I don't really have specific measurem
ents for this recipe because I keep tasting the liquid mixture until I get the taste that I like...I've put in some measurements for those who need more specific instructions...


Ingredients


500grams of cherry tomatoes (or more)
2 medium red onion chopped finely (depending on your taste prefer, more tomatoes more onions)
a handful of fresh basil (or 1 tablespoons of dried basil)
approx 1/2 cup Fruity vinegar
pinch of salt
pinch of pepper
Sugar as required
juice of 1/2 to 1 lemon
rind of one lemon

Squeeze the tomato juice into a mixing bowl. To prevent the tomato juice from squirting everywhere (I literally mean it) use your finger to poke an opening on the top of the tomato where it attached to the stalk.


Next, add the chopped red onions, fresh basil (or dried basil), vinegar, pepper, lemon juice and lemon rind into the tomato juice. Mix it together really well. If there aren't enough tomato juice, add a little bit more vinegar. It should be a liquid mixture at this point.

Add salt and sugar as required and keep tasting the mixture until you achieve the taste that you like.

Next, add all the squeezed cherry tomatoes into the mixture and mix it well, put it into the fridge for an hour before serving.


Labels: Recipes

Sunday, 29 April 2007

Cuuuutie Cherries!!!

The tomato season has rapidly come to an end. This morning I decided that I should harvast all the cherry tomatoes. I love cherry tomatoes best for it's many virtues.


It's sooooo sweet, one can eat it like a fruit (anyway, some would argue that tomato is indeed a fruit), makes a beautiful quick tomato salad, productive plant, starts early in the season, looks charming in my veg garden, minimal fuss required, birds can't get to them easily, they are so colourful...(yes, there is a late season slug pre-tasted strawberry in the basket)


Labels: Autumn Garden, Vege Garden

The backyard

This was the backyard in late summer. Matt took these arial pictures from the roof and I kinda of merged them together using paint. The picture is a little distorted but hey, you get "the picture"!

The veg beds were boxed in with macrocarpa sleepers so I lost the edges for planting. The plus side was we had a raised bed for planting carrots and parsnips. However, the entire design looked and felt a little rigid and boxed in and I didn't like the lack of "roundness". We're in the process of putting in lots of circle to go with our new chicken tractor. Stay tuned!! :-)


Labels: The Chooks

Friday, 27 April 2007

Playing with videos...

Well, I wanted to find out how to embed youtube videos into the blog. It turned out to be simple.

So, without further adieu, here is video that shows the kind of thing you can achieve in a small urban back yard in California. Who says you need 6 acres? Just look whats going on in 1/5 of an acre! They are our inspiration.


Labels: Permaculture

Thursday, 26 April 2007

FIRST tray of Eggs!!

in April 2006 from our VERY FIRST two pullets given by a friend.


Broody (left) and Black Bird (right)
(Each chook has distinctive personality and features that tell them apart. The names are really our best effort to not get too emotionally attached to them for a good reason....)


It was a mixed feeling eating those lovely eggs - imagine the "pain in my heart" when my mother in law poached 6 of those eggs in one go for breakfast at our place....that meal tasted "bitter sweet"!! :-) Somehow eating eggs takes on a whole new meaning when you see where they came from. We haven't bought any supermarket eggs since last April.


Labels: The Chooks

Wednesday, 25 April 2007

BACK TO WORK!

Sniff...sniff...back to work tomorrow! Had so much fun while "in poxies". Thanks Tara, Max and Abby and of course my superbly wonderful husband :-)


Labels: Health

Tomatoes Galore!!

I waited all year to eat my homegrown tomatoes - not kidding i don't buy fresh tomatoes from the supermarket. The lack of flavor alone is sufficient to put me off...and even the canned tomatoes taste better...

One of 6 tomato plants survived despite planting it out at the usual time! Fortunately the sole survivor did more than survive - it produced just under 10 kgs of tomatoes. If only the others had survived.... The trick to maximize production per plant is to pile compost at the base of the tomato plant where the laterals are growing. By doing so, it will encourage the laterals that are covered with soil to form roots, and essentially grow as another plant. The main stem that is in contact with the compost will develop even more roots thus enabling the plant to take in even more nutrients. That means more tomatoes too! What a nice trick to truely get more for less!!


Labels: Vege Garden

Chicken Pox #3

The "poxies" have mostly disappeared. Apparently I had had a mild case of chickenpox and all credits to the daily consumption of garlic veg juice and the loving prayers from my "Thursday night family" :-).

The whole experience has been short of a little science experiment: Aloe vera didn't work when the blisters are appearing but it's great when the scabs appear. Applying aloe vera
at this point to minimize scaring. Vinegar "stings" the burst blisters but by far, MOST effective in easing itchness. Once the vinegar takes care of the itch, the Colloidal silver cream with active manuka honey completely sooths the sores and seems to also speed up healing. Any spotted spots/blisters were not spared the cream. In fact, my skin loves it so much that I'm now using it as a face cream after dabbing on the healing scabs!! Apparently it the "total skin food"!!


Labels: Health

Wednesday, 18 April 2007

Chicken pox #2

On the second evening, the itchness got very unbearable. A hot bath with boiled up in a muslin cloth made a perfect hot bath sponge. In this case, it was the warm rolled oats milk coming through the museli cloth. It was very gentle on the skin and on the "poxes". As long as I was in the bath, the itchness went away. The skin felt absolutely soft after the bathHowever, I did discovered that more red dots started appearing after the hot bath; it could be a coincidence!!!

The itchness came back a few hours later. It took quite an amount of endurance to resist scratch as the night progressed, finally at 4am in the morning,my darling husband was landed with the task of dabbing calamine lotion all over my spotted body. The spots are mostly on my back. Much to my disappointment, the calamine lotion didn't do much to ease the itchness but I did fall asleep for a few hours. In my sleep, all I could think about was what would ease the itchness? Suddenly I remembered witnessing a friend dabbing vinegar on a bee stings on his face, and it stopped the itchness and swelling. You guess it right, no time was wasted, I jumped out of bed (literally), poured some white vinegar into a small cup, and wet the cotton bud with the vinegar and dabbed it on all itchy spots, I dabbed on all spots repetitively until the itchness went away....it really works!! :-)I've also noticed that the spots with blisters this morning (8am) are now (12:35pm) starting to dry up....I continously apply vinegar on any spot that is calling out for attention

My most devoted husband has been preparing vegetable juices for us since that first day of getting the pox! And he has been most generous with the garlic to keep any baterial and virus and friends, at bay, if the pox didn't do the trick!! This juice give my body a really good boost and keeps the immune system going strong to fight this attackquickly and efficiently. Getting the pox as an adult, I could be in danger of getting shingles with a compromised immune system.

On top of that, I've abstained from tasty food, reducing my colourful diet to the plain boiled vegetables (carrots, cabbage - whatever I can find in my veg garden) in rice porriage (rice with lots of water)and loads of fresh fruit. This is to not put more pressure on my already compromised body to enable it to fight out the virus quickly and efficiently. On top of that, lots and lots of filtered water, and of course, plus endless trips to the toilet!!


Labels: Health

Monday, 16 April 2007

Chicken Pox #1

I have always had a strong inclination towards herbal remedies than the exisiting drug prescription, so I decide to keep a record on the findings from my research.


Chicken pox arises from the elimination of toxic fat or fatty acids through the hair fat glands. The chemical burn from the purging of waste products though the skin causes the characteristic blister of this disease..... http://www.garynull.com/Documents/Vaccines/ChickenPoxWhy.htm

Fever in a child is a frightening symptom to the mother. Just what is the function of fever? Is it a harmful process, something to suppress and worry about? Or is it the body’s attempt to burn up a poison, thereby helping to dispose of it more quickly http://www.garynull.com/Documents/Vaccines/ChickenPoxWhy.htm

If you are feeling adventurous, here's the Salt and vinegar treatment....http://www.otan.dni.us/webfarm/emailproject/chickenpox.htm

Another simple and effective treatment for itching...
http://www.stopgettingsick.com/Condtemplate.cfm-1337-82-1?print=1

More herbal remedies for chicken pox http://www.newlifejournal.com/april07/herbal-healing-chicken-pox-remedies.shtml


Labels: Health

I've got Chicken Pox!!


I found a blister on my back this morning. A friend who is a mother of two, with one recovering from chickenpox and one having it at the moment, confirmed that I, indeed have chicken pox.

The little bit that you see on the picture is the back of my right arm... :-)


Apparently I had 2 blisters on my neck yesterday but I didn't give much thought to it and had burst them.

A fever sets in this afternoon.

Have been applying aloe vera on all the spots throughout the day.

A few bumps pop out of my scalp. It feels warm and lumpy and painful if I touch it.


The blisters burst by the afternoon and at 5pm it looked like this


I've been drinking lots of water and needless to say, paying endless trips to the toilet.

Decided that it maybe a good time to detox - so my God-sent husband made us both a tall glass of carrot, apple and half a bulb worth of garlic juice - for pre-dinner. He's drinking it to increase his immune system so that he can look after his not so well wife!! :-)

Dinner was rice porriage - grated carrots and shredded cabbage with garlic. Total plain but it wasn't too bad, prepared by my husband, again. Basically, I'm not allowed to do dishes, and housework, to avoid spreading the virus - honestly, I don't mind it at all. However, I'm allowed to make myself as comfortable as possible and order him around - that's got to be an A+++++ for my good husband!!

It's starting to itch now at 9:50pm ....very tempted to scratch ...so aloe vera to the rescue...

Bumps are developing on my facing now at 10:05pm....just when I thought I might escape it.... within minutes, the bumps start turnining into small blisters that get bigger...there is definitely something in ear/or in the throat somewhere because it hurts when I swallow but I can't pinpoint the exact spot...and it's getting more painful...apart from the itch!!

More red bumps are forming on the front of the body...


Labels: Health

Zucchini Pickle

With 6 zucchini plants in the garden, we have been cooking zucchini in all possible creative ways for the last few months...my favorite method is to cut it into thin stripes length wise, and pan grill with some olive oil, curry powder and a sprinke of salt - and it's absolutely yummy on it's own or add to a salad of anything/stir fry etc....grilled capscium makes superb partner to zucchini cooks this way.

But zucchini pickle tops the above to be my favorite.


To make 7-8 cups
1 kg zucchini
750 grams onions
1/4 cup salt
2 red pappers
1 cup sweet corn

4 cups water
1 1/2 cups sugar
1 tbsp mustard seeds
2 tsp celery seeds
Juice and rind of a lemon
juice of 1 lemon
1 1/2 tsp turmeric
2 cups of cider vinegar
1 tbsp cornflour (or arrowroot powder)


grate the zucchini and cut the onions roughly into the size of wheat grains - take care to not overdo it! Chop the peppers finely too.

Put the chopped vegetables and the corn into a large bowl and mix the salt in. Leave it for half an hour, then add the water, stir and pour through a large, coarse sieve or colander. Discard the salty liquid (make sure that you stir through enough to remove as much salt from the vegs otherwise it would be too salty)


Next, put the drained vegetable, sugar, seeds, turmeric, lemon rind, lemon juice and vineger in a large heavy bottomed pot. Bring to the boil, then simmer for 30 minutes, stirring often. Mix the cornflour to a paste with 2-3 tbsp cold water, stir into the pickle, an boil for 5 minutes longer.

Pour into clean, heated jars and seal with boiled metal lids. Refrigerate all opened jars.

I served it to my in laws and friends and it was a hit!!!


Labels: Recipes

Wednesday, 11 April 2007

Pie from Russian

Nonna was a Russian workmate of mine who shared this delicious recipe with one of my ESL classes - English through Cooking and Culture!! :-) We actually made this in class and nothing much was left at the end of the lesson.

Very inexpensive recipe to make the night before a party and reheat in the oven just before serving...

Pastry
350 grams high quality flour
15 grams sugar
1 egg
75 litre milk or cream
30 grams Sour cream
1 tsp salt
2 tsps baking powder (1 tsp baking soda and 1 tsp cream of tartar)

Cabbage Filling
1 small white cabbage
3 eggs
100 grams butter
salt to taste
Sugar (if the cabbage isn't sweet)

This is how you make it...

To make the pastry, melt butter, add milk, sour cream, egg, salt, sugar together. Mix thoroughly, put in flour mixed with baking powder. Stir and knead until you get a well-blended pastry.

To prepare the Cabbage Filling, shred the cabbage head finely. Next, melt the butter on the frying pan. Add the cut cabbage and simmer it until it's semi cooked. Break the eggs and add it to the cabbage. Add salt and sugar to taste and simmer for another 3-5 minutes.(depending on the texture you like to achieve)

Leave cabbage filling to cool.

(an important step otherwise it will break the pastry)

Divide the pastry into three parts. Roll each into a rectangular sheet with a thickness of an inch (the thickness is to your preference, so long it's thick enough to hope the cabbage filling).


Drain the cabbage filling(make sure it's very dry otherwise it will leak out of the parcel while baking in the oven) and put it on the rolled pastry and roll it up. Press the pastry together to on all the edges. It should look like a giant spring roll. Take a fork and poke some holes to on the top of the pastry (this is to allow the stream to escape from the parcel when it's baking).

Put it into the oven pre-heated to 170 celcius and bake it until the pastry turns golden brown.


If you can be bothered, apply a glaze of beaten eggs on the top when it's just turning brown. And continue to bake until golden brown.

My Modification

Instead of using the pastry recipe above, I turn to the all reliable Filo pastry. To the cabbage filling, I put in the following additional ingredients:

1) 1 can of butter nuts

2) 100 grams of bacon pieces (cut into small pieces)

3) 1 bay leave (crushed into small pieces)

4) 50 grams
Add to bacon pieces in with the 50 grams of butter ( I cut the butter by half because the fat from the bacon pieces will make up for the remaining fat requirement).

Fry the bacon pieces till it turns brown and nearly crispy. Add the crushed bay leaves in with bacon pieces to fry for a few seconds. Add the cabbage and cook it as per the instruction in the above recipe.Add drained butter a few minutes before the cabbage is cooked.


Labels: Recipes

Newer Posts Older Posts Home
Subscribe to: Posts (Atom)

The Authors

The Authors
Esther & Matt
Contact Me

Search

Labels

  • Autumn Garden (4)
  • Children (1)
  • Community Gardens (1)
  • Compost (2)
  • Environment (5)
  • Family and Friends (3)
  • Fermentation (5)
  • Fruit Trees (3)
  • Fun Stuff (1)
  • Health (8)
  • Herbs (1)
  • Judith's Garden (2)
  • Nourishing Food (6)
  • Permaculture (5)
  • Pest and Fungal Control (4)
  • Pigs (3)
  • Pregnancy (1)
  • Propagation n Planting (4)
  • Raw Milk (4)
  • Recipes (14)
  • Self Improvement (1)
  • Self-sufficiency (8)
  • Spring Garden (9)
  • Summer Garden (3)
  • The Chooks (10)
  • Tips (4)
  • Urban Permies Monthly Meeting (10)
  • Vege Garden (19)
  • Web Design (2)
  • Winter Garden (6)

ARCHIVE

  • ►  2012 (1)
    • ►  Feb (1)
  • ►  2009 (2)
    • ►  Feb (2)
  • ►  2008 (42)
    • ►  Oct (2)
    • ►  Jul (8)
    • ►  Jun (10)
    • ►  May (2)
    • ►  Apr (4)
    • ►  Mar (1)
    • ►  Feb (9)
    • ►  Jan (6)
  • ▼  2007 (45)
    • ▼  Dec (1)
      • Growing Carrots - Part 1
    • ►  Nov (8)
      • Collecting Gold - Part 1
      • Broad Beans
      • Permaculture Paradise or not?
      • LeEkS take forever....
      • Square Foot Gardening
      • Urban Permies Monthly Meeting
      • Cutworm
      • Lightweight, Energy independent, Odourless Tractor...
    • ►  Oct (5)
      • The Mandala garden in late August
      • Globe Artichoke
      • George the Second
      • Friend's advice for a winter veggie garden
      • 2007 October Urban Permies meeting
    • ►  Sept (3)
      • Organic Fungal (RUST) Control
      • Winter gardening in Spring??
      • Rhubarb Galore...
    • ►  Aug (7)
      • June Urban Permies Meeting Update
      • Snow peas...
      • Lemon Meringue Pie
      • Think Leeks and Brassicas and peas...
      • Still not too late to plant Snow Peas
      • Chocolate and Vanilla Swirl cookies
      • July Meeting
    • ►  May (4)
      • May's Meeting
      • April's Meeting
      • WOW..that's a super jumbo!
      • Ded's Cherry Tomato Salad
    • ►  Apr (15)
      • Cuuuutie Cherries!!!
      • The backyard
      • Playing with videos...
      • FIRST tray of Eggs!!
      • BACK TO WORK!
      • Tomatoes Galore!!
      • Chicken Pox #3
      • Chicken pox #2
      • Chicken Pox #1
      • I've got Chicken Pox!!
      • Zucchini Pickle
      • Pie from Russian
    • ►  Mar (2)

Must Read Health Links

  • * Nourished Magazine
  • * Nourishing Traditions
  • * Regaining Health Naturally

Amazing Self Sufficiency Links

  • * Life In A New Zealand Farmet
  • * Path to Freedom USA

My Other Blogs

  • The UrbanPermies Writing Journal

Some Favorite Blogs

  • Isabells Shipard Herb Blog AU
  • Passionate Homemaking
  • Scarecrows Garden AU
  • Sharon's Thoughts
  • The Quirky Tribe NZ
  • The Thornton Williams Family
GotQuestions?org
Powered By Blogger

The Moon Phase

CURRENT MOON
lunar phases